With the release of VMware Cloud Foundation 9.0, VMware is ushering in a new era of private cloud management, where data services become an integral part of the automated platform. A key element of this transformation is VMware Data Services Manager (DSM) 9.0, an advanced Database-as-a-Service (DBaaS) tool that is now fully integrated with VCF Automation.
In this detailed guide, we will walk step-by-step through the entire process—from deploying the DSM appliance, through configuring policies in vSphere and VCF Automation, to provisioning a fully functional PostgreSQL database in a self-service model for the end-user (tenant). The goal is to demonstrate how this deep integration enables administrators to maintain complete control and governance while providing developers with the agility and speed typically associated with public clouds.
What is VMware Data Services Manager?
VMware Data Services Manager is a solution that provides a toolkit for on-demand provisioning and automated management of popular databases, such as PostgreSQL and MySQL (and, in version 9.0, also Microsoft SQL Server in Tech Preview), directly within the vSphere environment. It simplifies tasks such as provisioning, backups, cloning, scaling, and updates by centralizing control and automating tedious operations.
Prerequisites
Before we begin, let’s ensure our environment is set up and ready. We assume a fully configured VCF 9.0 environment is in place, as described in my previous articles:
- A deployed VMware Cloud Foundation 9.0 instance.
- A configured edge router (in our lab, this is pfSense).
- A deployed NSX Edge cluster and a Tier-0 Gateway.
- An activated Supervisor Cluster.
- A configured VCF Automation instance with at least one organization.
- Access to the VMware Data Services Manager 9.0 appliance OVA file.
Part 1: Deployment and Basic Configuration of VMware Data Services Manager
Our journey begins with the deployment of the central component: the DSM appliance.
Step 1: Deploying the DSM Appliance from the OVA File
DSM is distributed as a single OVA file, which we deploy using the “Deploy OVF Template” wizard in the vSphere Client.
- Select an OVF template: Point to the downloaded
dsm-va-9.0.0.x.ovafile. - Select a name and folder: Give the virtual machine a name (e.g.,
vcf-dsm) and choose a folder. - Select a compute resource: Choose the cluster where the appliance will run.
- Review details and select storage: Review the details and select the target datastore (e.g., vSAN) and disk format.
- Select networks: Choose the management network for the appliance.
- Customize template: This is the most critical stage of the deployment. We must provide key information that will be injected into the appliance during its first boot.
- Appliance Root Password: The access password for the appliance’s console and SSH.
- vCenter Details: The FQDN or IP address of vCenter, the SHA-256 thumbprint of the certificate, and vCenter administrator credentials.
- Networking Properties: A static IP address for the management network, subnet mask, default gateway, DNS, and NTP servers.
- Ready to complete: On the “Ready to complete” screen, verify all the entered data.
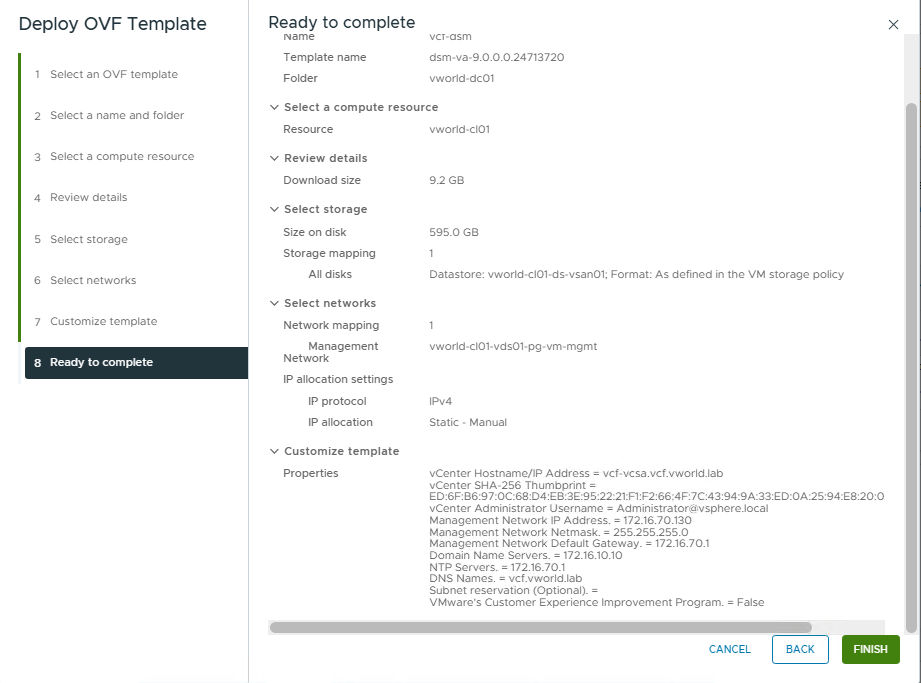
After the deployment is complete and the virtual machine is powered on, DSM is ready for further configuration.
Step 2: First Login and Create the DSM Administrative User
Before integrating DSM with VCF Automation, we need to create a dedicated administrative user within DSM itself.
- Open the DSM appliance URL in a browser (e.g.,
https://vcf-dsm.vcf.vworld.lab). The login screen will greet you.
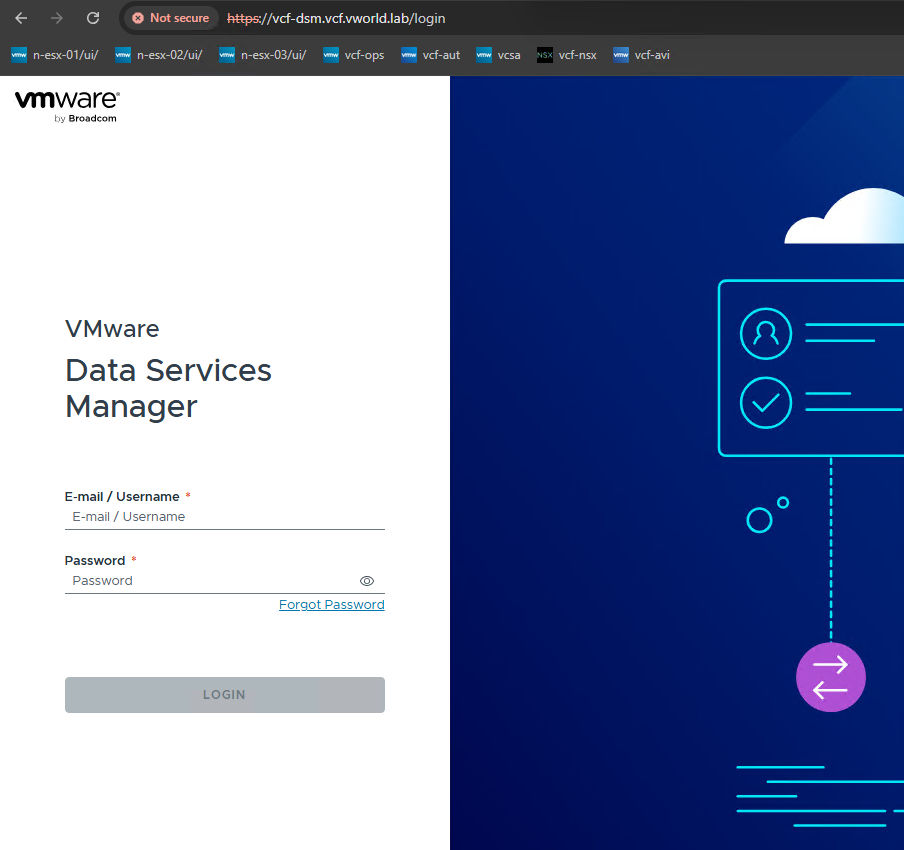
- Log in using the
rootcredentials and the password provided during the OVA deployment. - Navigate to the Permissions section. Initially, the list is empty.

- Click “CREATE” and create a new user, assigning them the DSM Admin role. This user will be a superuser in the context of DSM, capable of managing all data services. Provide their email address (which will serve as their login) and a password.

Step 3: Connecting VCF Automation with Data Services Manager
Now that we have a dedicated DSM administrator, we can connect the two systems.
- Log in to the VCF Automation Provider Management portal.
- Navigate to VCF Services -> Data Services. You will see a welcome screen.

- Click CONFIGURE SERVICE.
- In the Configure Data Services form, provide:
- Data Services URL: The URL of our DSM appliance.
- Certificate Authority Certificate: The CA certificate for the DSM appliance.
- Data Service Admin Username / Password: The credentials for the
admin@vcf.vworld.labThe user we created in the previous step.

- After clicking CONFIGURE, the system will establish the connection. A successful integration will be confirmed with a Connected status.

Part 2: Creating Infrastructure Policies in vSphere
The integration is ready, but VCF Automation informs us that one key element is still missing: Infrastructure Policies.

These are the “guardrails” that define where and on what resources databases can be deployed. We create them in the vSphere Client.
Step 1: Creating an IP Pool
Databases deployed by DSM require static IP addresses. We must define a pool from which they will be allocated.
- In the vSphere Client, navigate to vCenter -> Configure -> Data Services Manager -> IP Pools. Initially, the list is empty.

- Click “CREATE” and fill out the form, providing a pool name, IP address range, subnet prefix, and gateway address.

Step 2: Creating the Infrastructure Policy
With the IP pool ready, we can proceed to create the policy.
- In the vSphere Client, navigate to vCenter -> Configure -> Data Services Manager -> Infrastructure Policies and click CREATE POLICY.

- In the wizard, go through the following steps:
- Policy Details: Give it a name (e.g.,
vcf-infra-policy) and an optional description.
- Policy Details: Give it a name (e.g.,

- Compute Resources: Select the vSphere cluster that will provide the resources.

- Storage Policies: Select the storage policies that will be available (e.g., the default vSAN policy).

- Network Port Groups: Select the port group to which the database virtual machines will be connected.

- IP Pools: Select the previously created IP pool (
vcf-dsm-pool).

- VM Folders (Optional): Specify a folder where the VMs will be placed.

- VM Classes: Select predefined or custom virtual machine classes (vCPU/RAM sizes) that will be available under this policy.

- Review: At the end of the wizard, carefully check all the settings and create the policy.

Part 3: Creating Data Service Policies in VCF Automation
The Infrastructure Policy defines where and how databases can be deployed, while the Data Service Policy in VCF Automation determines who can deploy what.
- Return to the VCF Automation Provider Management portal and navigate to VCF Services -> Data Services -> Data Service Policies. The list is empty.

- Click NEW POLICY.
- In the wizard, configure:
- Basic Information: Policy name (e.g.,
vcf-postgres) and service type (Postgres).
- Basic Information: Policy name (e.g.,

- Assignment: The scope of the assignment—e.g., to all current and future organizations.

- Versions: Allowed database versions (e.g., all versions).

- Infrastructure: Select the allowed Infrastructure Policies. This is where we link the VCF Automation policy with the policy created in vSphere (
vcf-infra-policy).

- Data Availability and Protection: Configuration for backup locations (we will skip this for now).

- Review and Confirm: Verify the summary and create the policy.

- The new policy is now visible on the list.

Part 4: Integrating DSM with the Supervisor Cluster
To allow tenants to deploy databases in their namespaces, we must install the Data Services Manager Consumption Operator as a service on the Supervisor Cluster.
- According to the documentation, the process requires downloading
package.yamlandvalues.yamlfiles.

- Edit the
values.yamlfile to point to our DSM environment. Key parameters includeendpoint(DSM URL), user credentials (user,password), and therootCAcertificate.

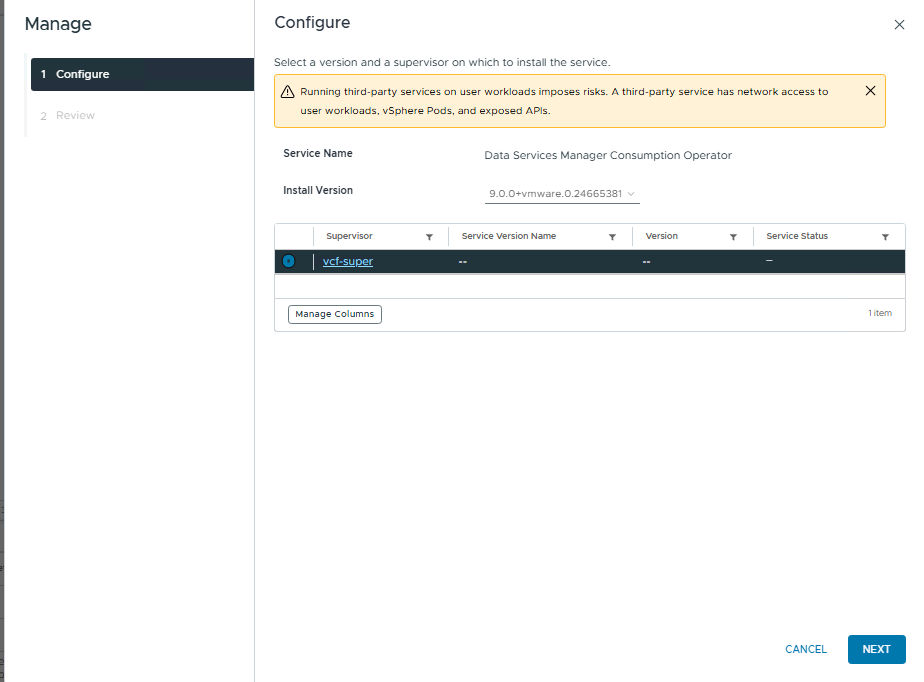
- In the vSphere Client, navigate to Supervisor Management -> Services and click Add New Service.

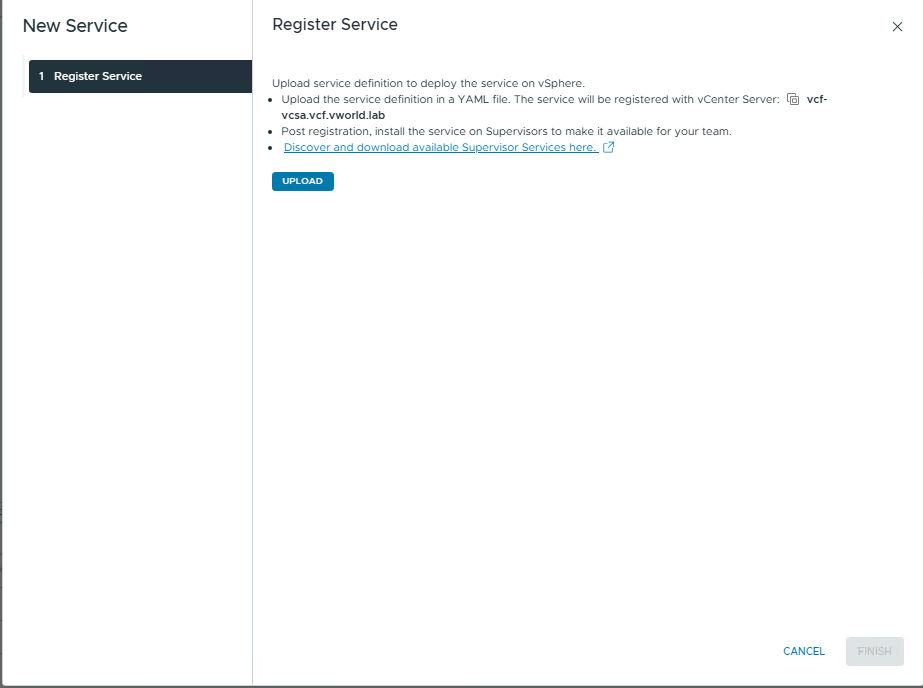
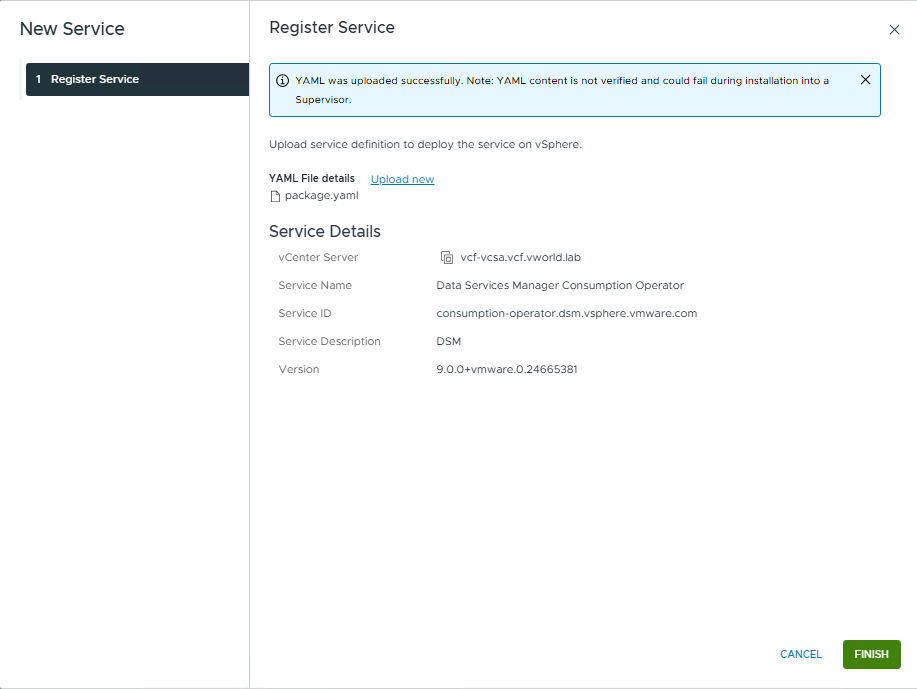
- Upload the modified
package.yamlfile. After a moment, the service will be successfully registered.

- Select the new service and click Manage.
- Specify the Supervisor Cluster (e.g.,
vcf-super) on which the operator should be installed.
- On the Review screen, paste the contents of our configured
values.yamlfile.
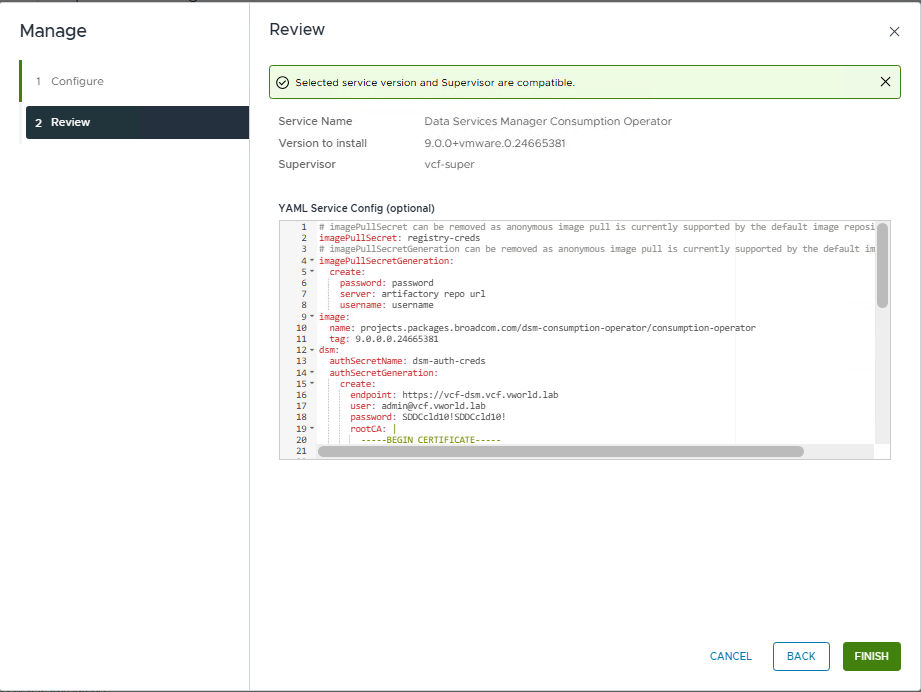
- Finish the installation. You can monitor the progress in the Recent Tasks panel.

Part 5: Deploying a Database by a Tenant in VCF Automation
All the pieces are in place. It’s time to step into the role of an end-user and deploy a database.
- Log in to the organization’s portal in VCF Automation.

- Navigate to Build & Deploy -> Services -> Database. Initially, there are no clusters here.

- Click CREATE and launch the database creation wizard:
- Basic Information: Select the database version, assign an instance name, choose a topology (e.g., Single Server), and specify the database administrator credentials.

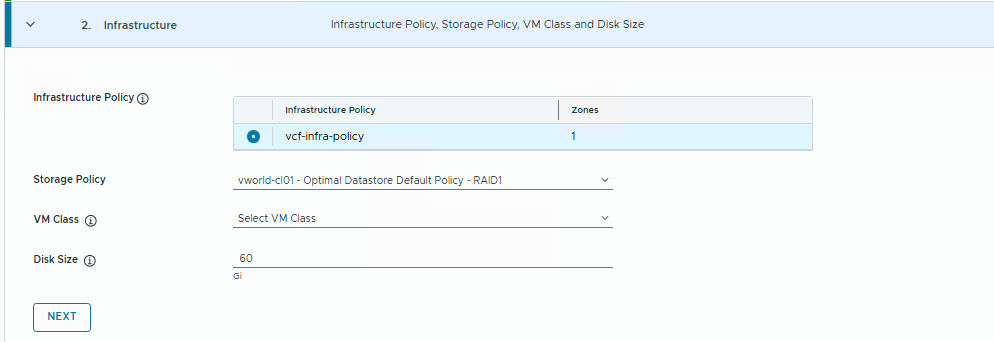
- Infrastructure: Select the Infrastructure Policy (
vcf-infra-policy), storage policy, VM class, and disk size.
- Backup and Maintenance: Determine backup strategies and schedule a maintenance window.

- Advanced Settings: Optional, advanced database engine parameters.

- Summary: Verify the entire configuration and click CREATE POSTGRES CLUSTER.

Part 6: Monitoring and Verifying the Deployment
The provisioning process is fully automated. We can observe it from several perspectives.
- VCF Automation UI: The database appears on the list with an In Progress status.

- vSphere Client: In the Recent Tasks panel, we see a task for cloning a virtual machine from a template.

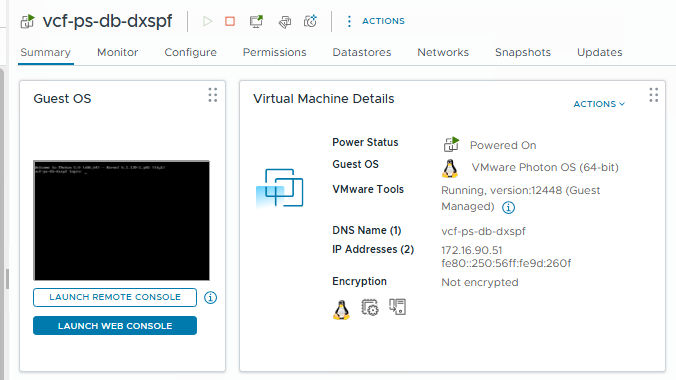
- Once finished, the new virtual machine (
vcf-ps-db-dxspf) is running and has an assigned IP address (e.g., 172.16.90.51).
- DSM UI: After logging into DSM, the newly created database is visible on the main dashboard.


- In the Databases -> Postgres section, clicking on the instance gives us access to details, including the crucial Connection String.

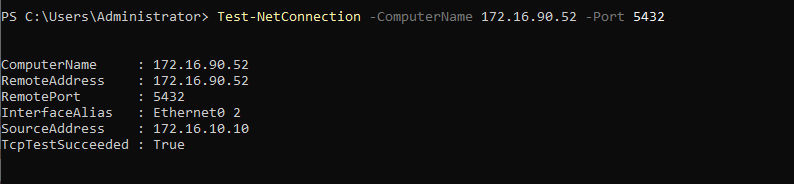
- Network Connectivity Test: From a machine with access to the database network, we can check connectivity to the new database using
Test-NetConnectionits IP address and port 5432. A result thatTcpTestSucceeded: Trueconfirms that the service is listening.
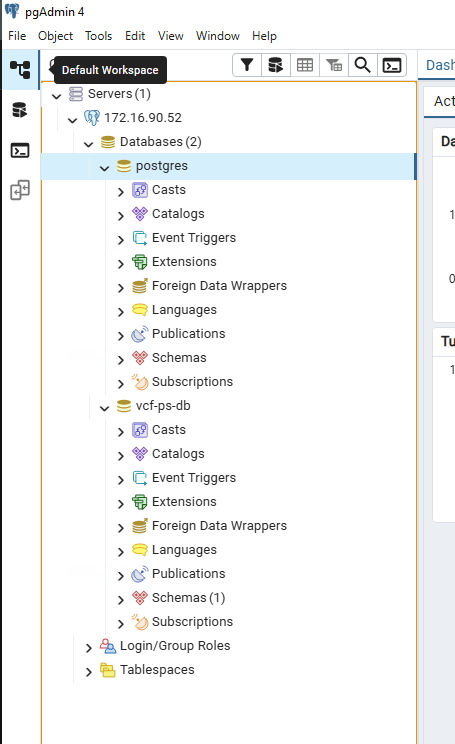
- Database Client Connection: The final step is to connect to the database using a client like pgAdmin 4. Using the IP address and credentials provided during creation, we can establish a connection and see our new database (
vcf-ps-db) ready for work.
Summary
We have walked the complete path, illustrating the power of integrating VMware Data Services Manager with VMware Cloud Foundation. Starting from the appliance deployment, through defining policies that govern resources and services, to a fully automated, self-service database deployment by an end-user.
This model delivers the best of both worlds:
- For IT Administrators: Centralized management, complete control over resource consumption, enforcement of security standards, and corporate governance.
- For Developers and Application Teams: Agility, speed, and simplicity of operation comparable to public cloud services, without having to wait for manual actions from administrators.
VMware Cloud Foundation 9.0 with Data Services Manager proves that a private cloud can be just as flexible and automated as its public counterparts, providing a solid foundation for modern applications and digital transformation.